Multi-layer fresco didactic panel, Early Renaissance with Renaissance plaster and Roman Grottesca with Roman plaster illustrated demonstration.
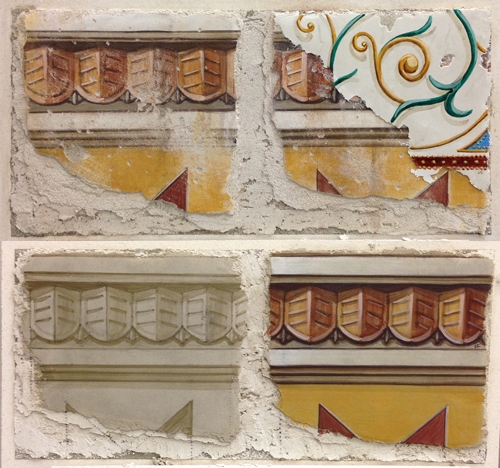
Early Reanessance and Roman Grottesca multi-layer didactic fresco panel, by iLia Fresco
The above is a completed multi-layer didactic fresco panel, I have used existing cartoons from my exterior buon fresco project for the first layer and interior roman fresco project for the second painting layer. Most likely I would do some staining for the Roman part when first stage of curing process is complete – in a couple of weeks. In the following pictures I have outlined the main steps of the painting process.
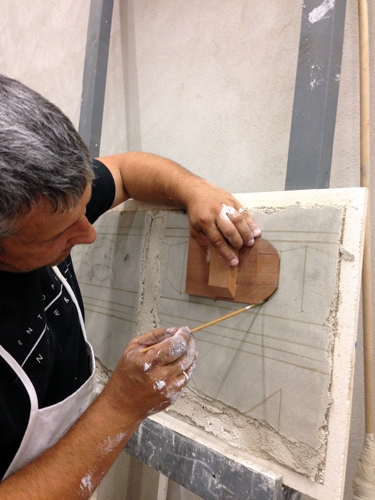
Sketching geometry on fresco panel in verdaccio, by iLia Fresco (Anossov)
First stage in creation of this muli-layer fresco panel is done using renaissance plaster system, which is the most paint and layer friendly. (details are in my BFF DVD tutorials).
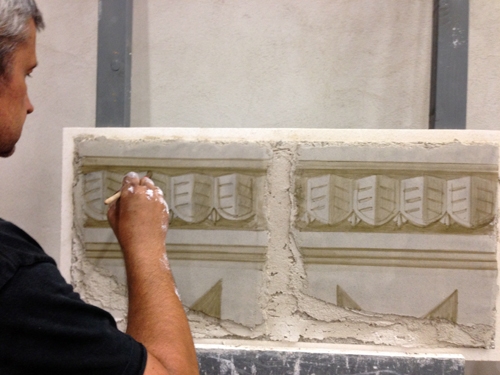
Verdaccio color layer, by iLia Fresco (Anossov)
The base under-painting is done in Verdaccio, which is the name for the painting stage and the composite pigment/color that is used for it. Classic oil painting have adopted this stage because it is the most efficient way to develop the values and depth of the color to follow. Dutch painters referred to it as “Dead Layer”.
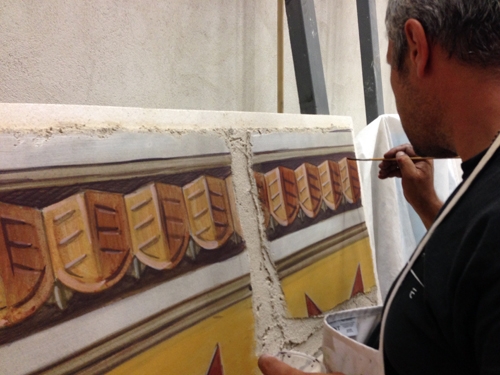
Finishing first layer of intonaco, by ilia Fresco (Anossov)
The whole painting of this stage/layer took under 2 hours all without using any white or black. Now I am adding highlight accents using “fresco white” made of the same lime putty I used for mixing plaster. Remember old principle – Transparent shadows and Opaque highlights.
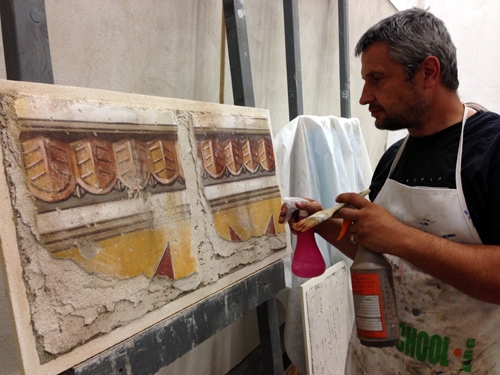
Aging didactic fresco panel, by iLia Fresco (Anossov)
Aging is a fun process, after this stage completely cured I used sand paper and margin trowel to gauge and scrape the paint layer. Followed by staining with a “dirty” pigment water.
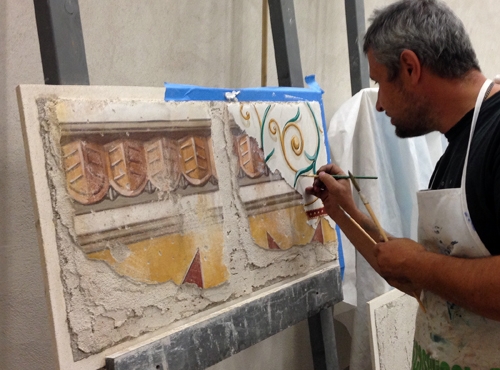
Finishing second layer of intonaco (with Roman plaster) for multi-layer didactic fresco panel, by ilia Fresco (Anossov)
Finally I applied Roman plaster, which is technically the same as Renaissance plaster with the only difference being the proportion and size of the aggregate. (more in my Fresco Plaster DVD tutorial). One of the reasons why Renaissance fresco painters stayed away from roman plaster composition is because it takes paint badly and does not fully allow for multiple paint layers to be applied over and over to build the value ranges and refined aerial perspective. I did not break the “historic reality” by placing Roman plaster over Renaissance plaster. Thee use of Roman plaster in fresco painting have returned after the Renaissance , to accommodate for the resurgence of grottesca, then during WPA and in frescoes by Diego Rivera.
iLia Fresco (Anossov)
————–
iLia’s unique real-time instructional style allows the viewer to have questions answered, reviewed until understood, and to watch the physical demonstration of each principle until it’s fully internalized. There is no need to take notes or photographs. The periodic summarizing text lays out the organized methodology that led ILia to produce his thirty years of personal experience and seventeen years of teaching fresco classes into this precise, linear process within a progressive and organized format. (click to order BFF Video Tutorials)
